I've been seeing ideas for doing interviews with kids on Pinterest and decided to do one with my own! Here's how it went:
When are you (or have you been) most afraid? In the dark.
What was the happiest day in your life? When I went to school.
If you could change one thing in the world, what would it be? A toy.
If you could change one thing about yourself, what would it be? Nothing.
What is the one thing you could not live without? Mama & Daddy
What is your favorite movie or show? Top Gear
What cartoon character would you most like to be? Mario
What is the worst thing about being 4 years old? Nothing!
What is the best thing about being 4 years old? I play games, play with my toys, play with Mama and Daddy, play Wii with my Mama and Daddy.
Describe your perfect day. I play Wii with my Mama and Daddy and then play toys with my Mama and Daddy.
What job would like to have when you grow up? Spray fire with water and help cats and people. Nevermind, just cats. I want to be a firefighter with a fire truck.
Who are your best friends and why? Will. But everybody at school that are boys and girls are my best friends.
What does Mama always say to you? Go play in your playroom.
What makes Mama happy? When I color pretty pictures and do nice stuff.
What makes Mama sad? When I don't color pretty pictures and don't do nice stuff.
How does Mama make you laugh? When you do silly stuff.
What was Mama like as a kid? She did nice stuff.
How old is Mama? 5? Um. 10.
How tall is Mama? 38 tall.
What is Mama's favorite thing to do? Play with me.
What does Mama do when you're not around? Fun stuff.
What is Mama really good at? Playing Wii.
What is Mama really bad at? Fixing stuff.
What does Mama do for her job? Takes pictures of me.
What is Mama's favorite food? I don't know.
If Mama was a cartoon character, who would she be? Mickey Mouse
How are you and Mama the same? We look like the same.
How are you and Mama different? I do different stuff.
How do you know your Mama loves you? Because.
Because why? Because you love me that much!
Where is Mama's favorite place to go? To Chuck E Cheese and play games with me.
---------------------
Some of his answers had me thinking, "Really?" while I wasn't surprised by others. He's such a sweet kid. This whole interview was worth hearing the answer to this question:
What is the one thing you could not live without? Mama & Daddy
Wednesday, April 11, 2012
Thursday, March 29, 2012
Easter Centerpiece
Super Kid and I threw together this little Easter centerpiece for our breakfast table yesterday. Everything (except the vase, which I had already) came from the Dollar Tree, which made this centerpiece cost a total of $5 and took all of 15 MINUTES!!! We love it!

How I did it:
What you need:
- Small vase - can be square or round
- Jelly beans - how much will depend on the size of your vase. I used one bag.
- Peeps - can be chicks or bunnies - Again, depends on the vase, I used 1 full pack (2 rows)
- Styrofoam floral arranging foam - mine was round, because my vase was round
- Faux flowers
- Foam Easter eggs on sticks (optional) - this was something I found as the Dollar Tree that was super cute. I don't know how else to describe them, LOL
What I did:
I put the styrofoam floral foam in the center of the vase. Then we filled around the styrofoam with jelly beans until it was to the top of the styrofoam, not OVER the top, just to the top rim. Then we arranged our Peeps on top of the jelly beans. Make sure you dust as much sugar off of your Peeps as possible. Otherwise, you'll end up with sugar all over your jelly beans and your vase. Then cut your flowers to the height you want and arrange them into the styrofoam floral form. If you have some cute stick-ins like the Foam Easter egg ones I had, you would add those last.
Voila! A cute, cheap, QUICK Easter centerpiece that the kids are sure to love!
Thursday, February 9, 2012
Photography
Thursday, December 15, 2011
Homemade Vanilla Brown Sugar Body Scrub & Super Kid's Teacher's Christmas Gifts
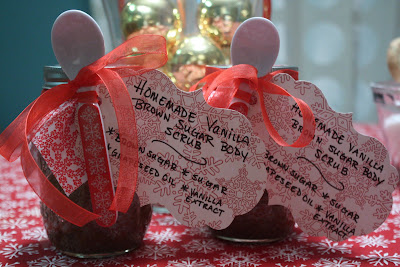
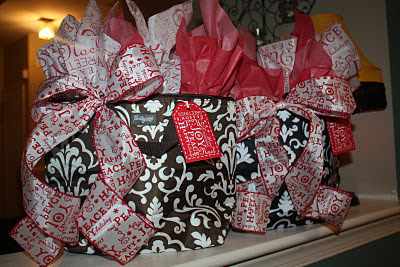
I tried a "recipe" for a homemade vanilla brown sugar body scrub and decided to make it for Super Kid's teacher's Christmas gifts! I put the homemade scrub, along with a little notepad, pen, and Christmas tissues in a Thirty-One Gifts Thermal Tote. I found the recipe here.
I made one change by using grapeseed oil instead of the suggested sunflower oil.
The Recipe:
2 cups Brown Sugar
1 cup Granulated Sugar
1 cup Grapeseed Oil
1 tablespoon Pure Vanilla Extract
Mix brown sugar and granulated sugar together until there is no lumps. Then add oil and vanilla extract and mix well until it is evenly moistened. Put into a sealable container (I used mason jars). Super easy!


Friday, November 4, 2011
Cork Board Jewelry Holder
I big, puffy heart jewelry. Not the expensive kind, the "costume" kind. I really needed something to put all of it on. I originally wanted a standing jewelry box, but those take up too much room. I wanted something simple and easily accessible. Thanks to another Pinterest idea, I have made a cork board jewelry holder! Really simple, almost too obvious for steps. I just bought 2 cork boards at Joann's. I found "T" pins in the sewing department there, also. The "T" pins prevent the jewelry from sliding off and the "T" part also makes for a nifty place to hang earrings. I also bought some decorative buttons and some ribbon. I glued a few buttons on the top right corner and a bow with a large button in the center on the bottom left for a decorative touch. Hang the jewelry on it and voila! Probably cost me all of $20-$25 to make and is working great so far! :)


Saturday, October 29, 2011
Mummy Cups
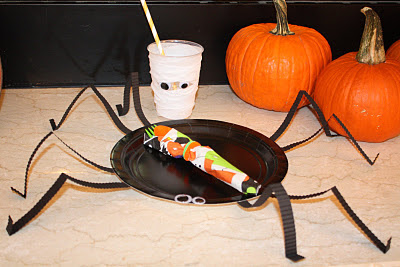
Here are the Mummy cups I made for Super Kid's School Halloween Party! And the entire set all together :)


How I did it:
What you need:
- Clear or white plastic cups
- White Streamers
- Googly eyes
- Glue or Glue dots
- Scissors
What I did:
Step 1: Glue or glue dot the googly eyes in place (see photos for placement).
Step 2: Wrap your streamers around the cup and around the eyes gluing here and there as you.
Step 3: Let dry! Add a cute paper straw or Halloween straw to finish it off :)
Check out the Spider Plates that go great with these adorable cups!


Friday, October 28, 2011
Spider Plates
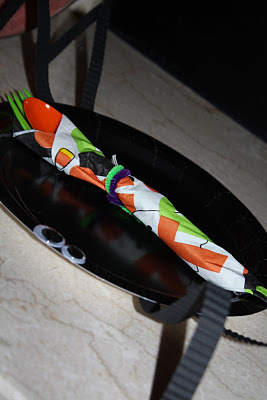
I'm in charge of paper products for Super Kid's FIRST EVER school party. I was overly giddy when I found out they were having a Halloween party, but I was a little disappointed that someone else had already signed up for the cupcakes (I LOVE cupcakes). My only option was the fresh fruit or paper products, so I picked the paper products, because really... what fun can you have with fruit that HAS to be cut into bite sizes?? Anyway, Here's the Spider Plates and silverware (cups are coming in a later post, because they're still drying)!


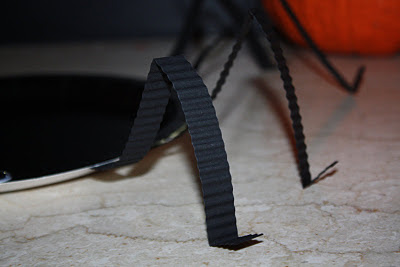


How I did it:
What you need:
*8 1/2x11 cardstock in black
*Black Paper Plates
*Googly eyes
*Paper Crimper
*Hot Glue Gun
*Paper Cutter or Scissors
What I did:
Step 1: Cut black cardstock into 8 1/2 inch by 1/2 inch strips (8 strips per plate).
Step 2: Crimp each strip using a paper crimper.
Step 3: Hot glue strips onto plate and then bend each strip in half and then bend a small tab on the end.
Step 4: Hot glue googly eyes! I used two different sizes for a fun, corky look.
I unfortunately can't take credit for this super cute idea. Here's the original tutorial.
Subscribe to:
Posts (Atom)


